Mastering Depth and Dimension: A Guide to the 3D Tunnel Layered Card with Envelope SVG
The evolution of paper crafting has moved far beyond simple folded greetings. Today, creators are seeking immersive experiences that engage the recipient through tactile interaction and visual surprise. At the forefront of this movement is the 3D Tunnel Layered Card with Envelope SVG, a sophisticated design that transforms flat cardstock into a multi-dimensional scene. This specific project offers a unique blend of artistic expression and engineering precision, requiring careful assembly to achieve its signature "tunnel" effect where layers recede into the distance, creating an illusion of deep space within a compact format.
For professionals, educators, and hobbyists alike, understanding the mechanics behind these layered structures opens up new avenues for storytelling. Whether used for high-end wedding invitations, educational models demonstrating perspective, or memorable marketing materials, the utility of this design lies in its ability to command attention. The following guide explores the technical specifications, material requirements, file compatibilities, and assembly workflows necessary to bring this intricate project to life.
Architectural Specifications and Design Metrics
To successfully execute a project of this nature, one must first appreciate the precise dimensions that govern its structure. The 3D Tunnel Layered Card with Envelope SVG is engineered with a final card size of 16 x 16 cm (6.3 x 6.3 inches). This square format provides a balanced canvas that supports symmetrical layering, which is crucial for maintaining the structural integrity of the tunnel effect. When fully assembled, the card boasts an unfolded thickness of approximately 4 cm (1.6 inches). This significant depth is what allows the six distinct layers to stand apart, creating the shadow play and parallax effect that defines the genre.
Complementing the card is a custom-sized envelope measuring 17 x 17 cm (6.7 x 6.7 inches) with a thickness of 0.8 cm (0.3 inches). The slight oversizing of the envelope relative to the card is not arbitrary; it is a critical design consideration. It ensures that the bulky, three-dimensional card can be inserted and removed without crushing the delicate spacers or bending the folded edges. For business owners considering these for client gifts, noting the envelope dimensions is vital for logistics and postage calculations, as the thickness often pushes the item into a non-standard mail category.
The design features an amount of detail rated at 6, indicating a moderate-to-high complexity level. This rating suggests that while the cutting process is straightforward for modern machines, the assembly requires patience and a steady hand. The approximate assemble time is estimated at 30 minutes. This timeframe assumes the user has pre-cut all pieces and is familiar with basic adhesive application. For beginners or those working in an educational setting with students, allocating 45 to 60 minutes is advisable to account for drying time and alignment adjustments.
Material Science and Tool Requirements
The success of any papercraft project is heavily dependent on the quality of materials selected. For the 3D Tunnel Layered Card with Envelope SVG, the structural demands are higher than those of a standard flat card. The project requires 5 sheets of A4 or US Letter cardstock specifically for the card components. The recommended paper density is between 160-250 g/m². This weight range is the "sweet spot" for layered cards; paper lighter than 160 g/m² may lack the rigidity to hold the layers upright, causing the tunnel to collapse, while paper heavier than 250 g/m² might be too thick to fold cleanly without cracking, especially on the intricate score lines.
In addition to the card layers, you will need 1 sheet of 30 x 30 cm (12 x 12 inches) cardstock for the envelope. Using a larger sheet allows for the necessary flaps and overlaps required to construct a boxy envelope capable of housing the thick card. Essential tools for this workflow include a reliable cutting machine, such as the Cricut Maker, Cricut Explore, Silhouette Cameo, or Brother ScanNCut. While manual cutting is possible with an X-Acto knife, the precision required for the small connecting tabs and uniform layer spacing makes a digital cutter highly recommended for consistent results.
Adhesion is another critical factor. Standard glue sticks may not provide enough tack or drying speed for vertical layers. Crafters often benefit from using liquid glue with a fine-tip applicator or double-sided foam tape for specific spacer elements to ensure the 4 cm depth is maintained uniformly. Having tweezers on hand is also a professional tip, as they allow for the placement of small details without obstructing the view or smudging the paper surface.
Navigating Digital File Formats and Compatibility
In the realm of digital crafting, file compatibility is paramount. The 3D Tunnel Layered Card with Envelope SVG package is designed to be universally accessible, archived in a single ZIP file containing a comprehensive suite of formats. This inclusivity ensures that regardless of the hardware or software ecosystem a creator uses, they can proceed with the project.
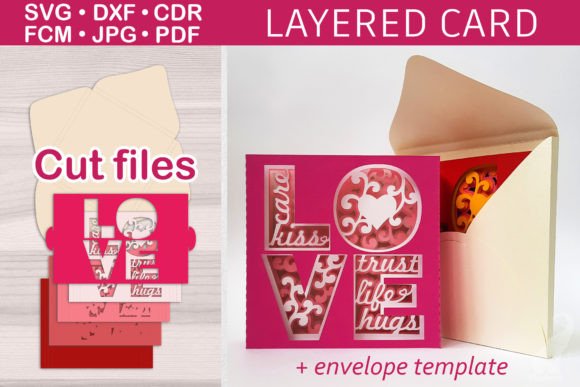
For users of Cricut Maker and Cricut Explore, the archive provides two distinct versions of the SVG template. The first version represents fold lines as straight lines, intended for crafters who possess a scoring tool. This allows the machine to score the paper before cutting, resulting in crisp, professional folds. The second version utilizes dotted lines to represent folds, catering to those without a scoring wheel or blade. In this scenario, the user must manually score or fold along the printed or cut guidelines, offering flexibility based on available tools.
Users of the Silhouette Cameo ecosystem are supported via the included DXF template. DXF files are the industry standard for vector exchange and work seamlessly within Silhouette Studio, allowing for precise manipulation of nodes and cut settings. Similarly, owners of the Brother ScanNCut can utilize the dedicated FCM template, which is optimized for Brother's proprietary software environment, ensuring that the machine reads the cut paths and internal details correctly.
For those interested in laser cutting or more advanced vector editing, the package includes a CDR template compatible with CorelDRAW. This is particularly useful for professionals who may need to modify the vector paths for custom branding or scale adjustments before sending the file to a laser cutter. Furthermore, the inclusion of JPG and PDF templates showing outlines without fill serves a dual purpose: they act as visual references for manual cutters and can be used for printing proofs to test color schemes before committing expensive cardstock to the final cut.
Rounding out the digital assets is a PDF tutorial in English. This document is essential for guiding the user through the layering sequence. Given the six levels of detail, having a step-by-step visual guide prevents the common error of assembling layers in the wrong order, which would disrupt the perspective of the tunnel effect.
Practical Applications and Creative Use Cases
The versatility of the 3D Tunnel Layered Card with Envelope SVG extends across various sectors. For wedding planners and stationers, this design offers a premium product that justifies a higher price point. The depth and interactivity create a memorable unboxing experience for guests, making it ideal for save-the-dates or main invitations where the theme involves depth, such as underwater scenes, forest vistas, or architectural arches.
In the educational sector, these cards serve as excellent tools for teaching concepts of perspective, geometry, and spatial reasoning. Educators can use the layered structure to demonstrate how objects appear smaller as they recede, providing a tangible example of vanishing points. The assembly process also fosters fine motor skills and patience in students, making it a valuable activity for art classes or STEM workshops focusing on engineering basics.
Marketers and brand strategists can leverage this format for high-impact direct mail campaigns. In a digital-saturated world, a physical object that demands interaction stands out. A real estate agent might use the tunnel effect to showcase a hallway leading to a dream home, or a travel agency could create a scene depicting a path leading to a tropical destination. The 16x16 cm size is substantial enough to convey luxury but compact enough to be handled easily.
For hobbyists and paper artists, the project represents a satisfying challenge. The ability to customize the imagery on each of the six layers allows for endless creative expression. One might create a seasonal scene with snowflakes in the foreground and a cozy cabin in the back, or a fantasy landscape with dragons and castles. The modularity of the SVG files means that experienced users can swap out elements, change the color palette, or even alter the shape of the tunnel while retaining the core structural logic.
Assembly Workflow and Best Practices
Executing the assembly of a 3D tunnel card requires a methodical approach. The process begins with organizing the cut pieces by layer. Since there are six levels of detail, labeling the back of each piece lightly with a pencil (e.g., L1 for front, L6 for back) can prevent confusion during the gluing phase. It is crucial to follow the sequence outlined in the included PDF tutorial, as the structural stability often relies on the correct stacking order.
When applying adhesive, less is often more. Excess glue can warp the cardstock or seep out onto the visible surfaces, detracting from the clean lines of the design. Applying small dots of glue to the designated tabs or using thin strips of double-sided tape ensures a strong bond without bulk. Pay special attention to the spacer elements; these are the unsung heroes of the tunnel effect. They must be aligned perfectly perpendicular to the base to ensure the 4 cm depth is consistent across the entire card.
Once the layers are assembled, the card should be placed under a heavy book for a short period to allow the adhesive to set and the paper to relax into its folded state. This step helps mitigate any warping caused by the tension of the folds. Finally, inserting the card into the 17x17 cm envelope should be done gently, ensuring the card sits flat against the bottom of the envelope to avoid stress on the corners during transit.
The 3D Tunnel Layered Card with Envelope SVG represents a convergence of digital precision and analog craftsmanship. By providing a robust set of files compatible with major cutting machines and clear instructions for assembly, this project empowers creators to produce stunning, three-dimensional art. Whether for personal enjoyment, educational demonstration, or commercial application, mastering this format adds a powerful tool to any creator's repertoire, proving that even in a digital age, the tactile magic of paper remains unmatched.